Wednesday 13 February 2013

Configure the printer driver to the correct port - MX712


In the following instructions, "XXX" signifies your machine's name.
Log on as a user account with administrator privilege.
Select items from the [ Start ] menu as shown below.
In Windows 7, select [ Devices and Printers ] from the [ Start ] menu.
In Windows Vista, select the [ Start ] menu > [ Control Panel ] > [ Hardware and Sound ] > [ Printers ].

In Windows XP, select the [ Start ] menu > [ Control Panel ] > [ Printers and Other Hardware ] > [ Printers and Faxes ].
Open the properties of printer driver for the machine.
In Windows 7, right-click the "Canon XXX Printer" icon (where "XXX" is your machine's name), then select [ Printer properties ].

In Windows Vista or Windows XP, right-click the "Canon XXX Printer" icon       (where "XXX" is your machine's name), then select [ Properties ].
Click the Ports tab to confirm the port settings.
Make sure that a port named "USBnnn" (where "n" is a number) with "Canon XXX Printer" appearing in the [ Printer ] column is selected for [ to the following port(s) ]. See More ( )
Request for service
CALL US +1-855-517-2433  (TOLL FREE)

How to Install canon downloaded drivers in Mac

Installing Downloaded Drivers

Visit Canon's Support & Drivers page .
From the Support & Drivers page, select your model in the following manner:
Select your Product Type (Printers & Multifunction, Scanners, Copiers & Fax, etc.).
Select your Product Family (PIXMA MX Series, CanoScan Series, Personal Copiers, etc).
Scroll down the list until you reach your model, and then click 'Drivers & Software.'
Select the appropriate Operating System in the Select Operating System drop-down list.

Note: Some links may launch in a new window. If you are having troubling viewing, please disable any active pop-up.
Select the version of the operating system from the Select OS Version drop-down list.
Click Drivers to expand the view.
In Drivers section click the description of the desired driver.
Click 'I Agree - Begin Download' to agree to the Disclaimer and continue the download process.
Note: Please read and follow any on -screen instructions throughout this process. Some products may have a separate file that includes detailed installation instructions. Other products may include installation instructions on the screen or have a link in the 'Setup' section of the page where you click 'I Agree - Begin Download'. The instructions may vary and should be referenced prior to the download.
The download will start automatically. If the following or similar message appears during the download, click 'Continue'.
Running the Downloaded file:

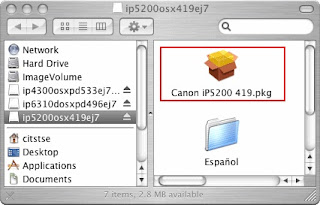
When the download has completed, a window showing the contents of the download will open.


Double-click the Setup icon or Package file (.pkg or .mpkg) to start the install. Follow any on-screen instructions that follow


If installation did not begin automatically:

Windows:

Download the file again and retry.

Some models create a folder in the download location. If so, open the folder, then double-click the Setup.exe file.(for multifunction printers this file is in the DrvSetup subfolder )

Double-click the disk icon that is created on the desktop after the file is downloaded from the website.
A window similar to the example in step 8 will open.

Double-click the the Setup icon or the .pkg or .mpkg file to start the Mac installation (iP2000 is used as an example below).

Follow any instructions that appear. See More ( )
Call us +1-855-517-2433 (Toll Free)

How to start the installation manually (PIXMA Printers)


Starting the  Manually

If AutoRun is enabled, the  starts automatically. If  does not start automatically, or you are  from the software copied on another drive, do the following:

Click Start then .

In Windows XP, click Start then My .

In Windows 2000, double-click the My  icon on the desktop.

Double-click the CD-ROM icon on the displayed window.

If the contents of the CD-ROM are displayed, double-click MSETUP4.EXE.

NOTE:

If the CD-ROM icon is not displayed, try the following:
Remove the CD-ROM from your , then insert it again.
Restart your .

If the icon is still not displayed, try different discs and see if they are displayed. If other discs are displayed, there is a problem with the Setup CD-ROM. In this case, contact the service center. See More ( )

Call us +1-855-517-2433 (Toll Free)

How to resolve error 6A80 on an MP990 in canon printer


 6A80

There are several reasons for  6A80 to appear. This article provides you recommendations with links to clear the message.

To clear the , click on the link to open the article and get detailed instructions.

If the above recommendations do not help you resolve the , the printer will need to be repaired.

Call us +1-855-517-2433 (Toll Free)

Error Code 6502 on Canon printer


Error Code 6502 appears generally after changing a cartridge.

Solution 1:
  • Unplug the printer.
  • Remove the faulty Cartridge
  • Plug in the printer and press and hold power button
  • Keep it held down. Press Resume twice, and this should reset the fault.
Solution 2:
  • The last cartridge installed may be faulty.
  • Install a new cartridge

Call Us +1-855-517-2433 (Toll Free)